Ideas for Painting Plywood Floors
Painting plywood floors presents a cost-effective and aesthetically versatile alternative to traditional flooring options. Plywood, known for its affordability and structural integrity, can be transformed into a visually appealing and durable surface through proper preparation, painting techniques, and the selection of appropriate materials. This article will explore a range of ideas for painting plywood floors, covering essential preparatory steps, design considerations, paint choices, and protective finishes.
The appeal of painted plywood floors lies in its ability to mimic the look of more expensive materials, such as hardwood or tile, at a fraction of the cost. Furthermore, the customizability offered by paint allows homeowners to tailor the floor's appearance to match their specific décor and style preferences. Whether aiming for a rustic, modern, or eclectic aesthetic, painted plywood provides a blank canvas for creative expression. However, successful implementation requires meticulous attention to detail and a thorough understanding of the materials and processes involved.
Before embarking on a painting project, it is crucial to assess the existing plywood floor's condition. Inspect for any signs of damage, such as warping, splintering, or water damage. Address these issues promptly by either repairing or replacing the affected sections. Ensure the plywood is securely fastened to the subfloor to prevent squeaking or movement. A stable and structurally sound foundation is paramount for achieving a long-lasting and aesthetically pleasing result.
Preparation is Key: Smoothing and Priming
The initial phase of painting plywood floors centers around meticulous preparation. This stage is critical for ensuring proper paint adhesion and a smooth, even finish. The first step involves thoroughly cleaning the plywood surface to remove any dirt, dust, grease, or debris. Use a vacuum cleaner with a brush attachment to remove loose particles, followed by a damp mop with a mild detergent. Allow the floor to dry completely before proceeding to the next step.
Sanding is an essential component of the preparation process. The purpose of sanding is to create a slightly roughened surface that will allow the primer and paint to adhere effectively. Start with a coarse-grit sandpaper (80-100 grit) to address any imperfections or unevenness in the plywood. Follow this with a medium-grit sandpaper (120-150 grit) to smooth out the surface. Finally, use a fine-grit sandpaper (180-220 grit) to achieve a polished and even finish. Remember to vacuum the floor thoroughly after each sanding stage to remove dust particles. Proper sanding will improve the visual appeal and durability of the painted floor.
Once the floor is sanded and cleaned, the application of a high-quality primer is crucial. Primer serves several important functions: it seals the plywood, prevents the paint from being absorbed into the wood, and promotes adhesion. Choose a primer specifically designed for wood surfaces. Apply the primer evenly using a brush, roller, or paint sprayer. Allow the primer to dry completely according to the manufacturer's instructions before proceeding with the painting process. A well-applied primer significantly contributes to the overall longevity and appearance of the painted plywood floor. Consider tinted primers designed to enhance the final paint color, especially when working with lighter shades.
Design Ideas and Paint Choices
The design possibilities for painted plywood floors are virtually limitless. The chosen design should complement the overall aesthetic of the room and reflect the homeowner's personal style. Solid colors, patterns, and faux finishes are all viable options, each offering distinct visual characteristics.
Solid colors provide a clean and modern look. Neutral tones, such as gray, beige, or white, create a versatile backdrop that can be easily integrated with various décor styles. Bold colors, such as blue, green, or red, can add a vibrant and energetic touch to a room. When selecting a solid color, consider the size of the room and the amount of natural light. Lighter colors can make a small room appear larger and brighter, while darker colors can create a cozy and intimate atmosphere.
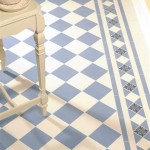
Patterns offer a more intricate and visually stimulating option. Stencils can be used to create geometric patterns, floral designs, or intricate motifs. Striped patterns, either horizontal or vertical, can add visual interest and elongate the appearance of a room. Checkerboard patterns, often achieved using alternating squares of different colors, provide a classic and timeless look. Freehand painting allows for the creation of unique and personalized designs, adding a touch of artistic flair to the floor. When choosing a pattern, consider the complexity of the design and the level of skill required to execute it effectively.
Faux finishes mimic the appearance of other materials, such as hardwood, tile, or stone. Wood graining techniques can be used to create the illusion of hardwood flooring, adding warmth and character to a room. Faux tile finishes can replicate the look of ceramic or porcelain tiles, providing a cost-effective alternative to traditional tiling. Stone finishes, such as marble or granite, can add a touch of elegance and sophistication to a space. When creating a faux finish, it is important to use appropriate tools and techniques to achieve a realistic and convincing result.
The selection of the right paint is paramount for achieving a durable and long-lasting finish. Floor paints are specifically formulated to withstand heavy foot traffic and resist scratches, scuffs, and stains. Oil-based paints offer excellent durability and resistance to moisture, making them a suitable choice for high-traffic areas. However, oil-based paints have a longer drying time and emit strong odors, requiring proper ventilation during application. Latex-based paints are water-based, making them easier to clean up and less odorous. Latex-based paints are also more flexible than oil-based paints, reducing the risk of cracking or chipping. Consider using a paint with a built-in primer to streamline the application process.
Sealing and Protecting the Painted Surface
Protecting the painted plywood floor with a durable sealant is essential for preserving its appearance and extending its lifespan. Sealants provide a protective barrier against scratches, scuffs, stains, and moisture. Polyurethane sealants are a popular choice for painted floors due to their exceptional durability and resistance to wear and tear. Water-based polyurethane sealants are low in odor and easy to clean up, while oil-based polyurethane sealants offer superior durability and a glossy finish. Apply multiple coats of sealant, allowing each coat to dry completely before applying the next. Follow the manufacturer's instructions carefully to ensure proper application and optimal performance. A well-sealed floor will withstand daily wear and tear and maintain its appearance for years to come.
Epoxy sealants are another option for protecting painted plywood floors. Epoxy sealants offer exceptional durability and resistance to chemicals, making them suitable for areas that are exposed to spills or cleaning agents. Epoxy sealants typically consist of two components that are mixed together before application. They create a hard, durable surface that is resistant to scratches, scuffs, and stains. Epoxy sealants can be more challenging to apply than polyurethane sealants, requiring careful mixing and application techniques. However, the resulting finish is exceptionally durable and long-lasting.
In addition to applying a sealant, taking preventative measures can help protect the painted plywood floor from damage. Use area rugs or mats in high-traffic areas, such as entryways and hallways, to reduce wear and tear. Place felt pads under furniture legs to prevent scratches and scuffs. Avoid using abrasive cleaners or harsh chemicals on the painted surface. Regularly sweep or vacuum the floor to remove dirt and debris. Promptly clean up spills to prevent staining. By taking these simple precautions, you can help maintain the appearance of your painted plywood floor and extend its lifespan.
The success of a painted plywood floor relies heavily on proper maintenance. Regular cleaning helps to remove dirt and grime, preventing them from becoming embedded in the paint or sealant. Use a soft-bristled broom or vacuum cleaner to remove loose debris. For deeper cleaning, use a damp mop with a mild detergent. Avoid using excessive water, as this can damage the plywood over time. Regularly inspect the floor for any signs of damage, such as scratches, chips, or cracks. Address any issues promptly to prevent them from worsening. With proper care and maintenance, a painted plywood floor can provide years of beauty and durability.
Painting plywood floors offers a creative and cost-effective way to transform a space. By carefully selecting materials, preparing the surface meticulously, and applying appropriate techniques, homeowners can achieve a stunning and durable flooring solution that reflects their personal style. The versatility of paint allows for endless design possibilities, making painted plywood a compelling alternative to traditional flooring options.

Diy Painted Plywood Subfloor Picklee

How To Paint A Plywood Floor The Easy Way Semigloss Design

Painted Plywood Floors 6 Steps With Pictures Instructables

How To Paint A Plywood Floor The Easy Way Semigloss Design

Painted Plywood Floor Update The Good Bad And Ugly

47 Painted Floor Ideas That Will Wow You The Heathered Nest

How To Paint Plywood Floors Thistlewood Farm

9 Rooms That Will Make You Want To Paint Your Floors

Painted Plywood Floors Bob Vila

Amazing Painted Plywood Subfloor A How To


